I remember stepping out my back door one spring and realizing the muddy path to the shed was killing the joy of my garden. It felt like a chore, not a welcome.
So I laid bricks. Simple red ones from a local haul. Suddenly, everything shifted. The garden breathed easier.
Now, every walk feels right. Paths draw you in, frame the plants just so. Yours can too—no fancy skills needed.
7 Classic Garden Brick Walkway Ideas
Here are 7 classic garden brick walkway ideas I've built and tweaked in my own yards. They're straightforward, forgiving for beginners, and make your space feel settled and right.
1. Straight Brick Path Edged with Low Boxwoods
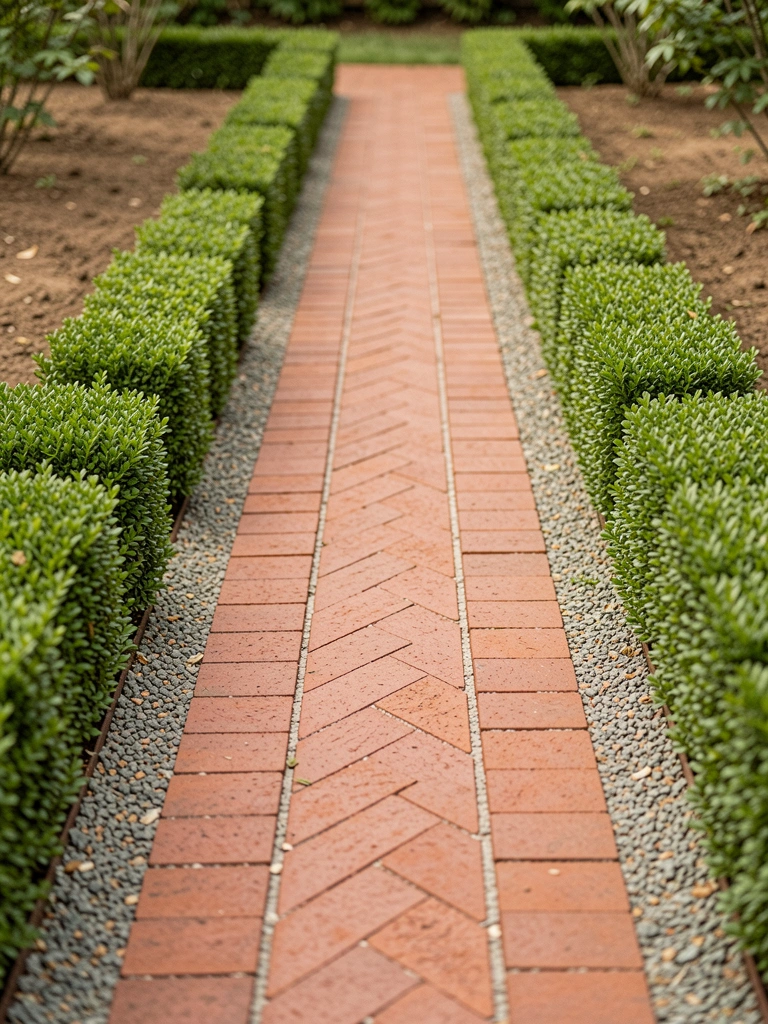
I laid this straight shot from my patio to the veggie beds last year. Used standard red pavers in a running bond—easy to level with sand. The boxwoods along the sides grew in slow but steady, softening the edges without crowding.
It changed how I move through the garden. No more wet feet, and the path pulls your eye clean to the beds. Feels orderly but not stiff.
Watch the bricks for settling—mine dipped a bit first winter. Topped with more sand, good as new. Trim boxwoods twice a year to keep that neat frame.
Space them 12 inches apart at plant. They'll fill out.
What You’ll Need for This Look
- Red clay brick pavers (4×8 inch)
- Dwarf boxwood plants (1 gallon)
- All-purpose sand for paver base (50 lb bag)
- Garden edging trim (plastic, 4 ft sections)
2. Curving Brick Walkway Lined with Lavender
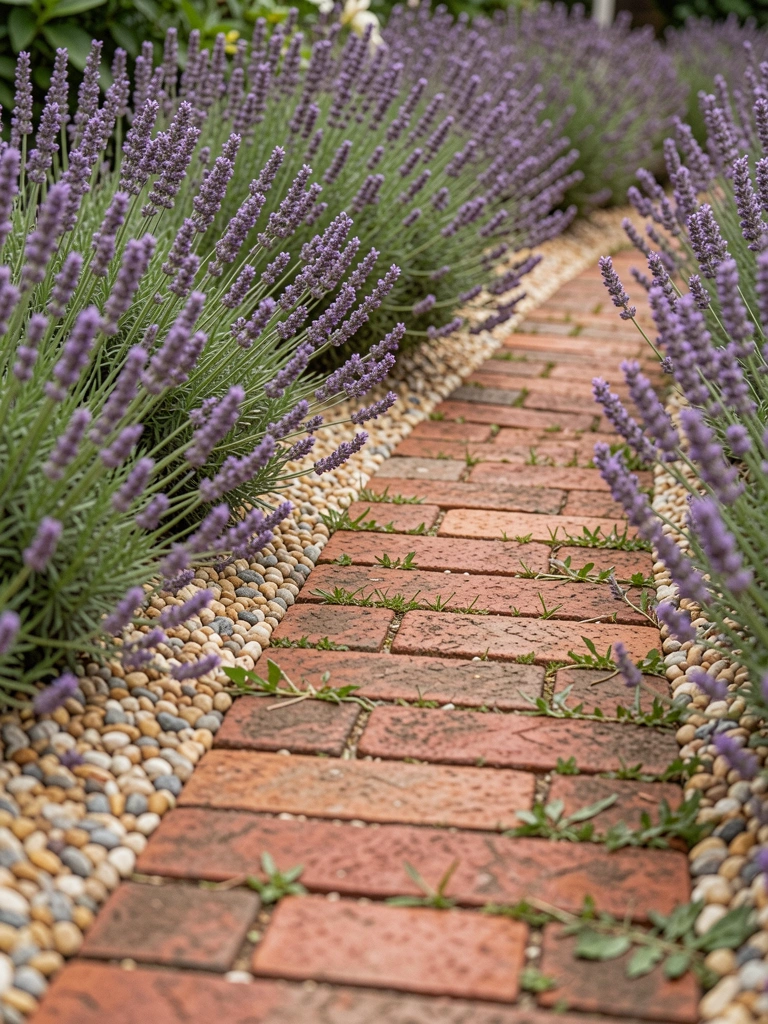
This curve guides you around my rose bed—laid it freehand with a hose outline. Lavender on both sides releases that calm scent when you brush past. Planted 'Provence' variety; it thrives in poor soil.
The bend makes short walks feel longer, more thoughtful. Flowers nod over the bricks in summer, hiding any gaps.
I overplanted at first—crowded the path. Thinned half, now it's perfect breathing room. Mulch yearly to cut weeds.
Bend gently, no sharp turns. Test by walking it first.
What You’ll Need for This Look
- Tumbled red brick pavers (standard size)
- Lavender 'Provence' plants (4 inch pots)
- Pea gravel (20 lb bag)
- Landscape fabric for weed barrier (3 ft x 50 ft)
3. Herringbone Brick Pattern with Gravel Shoulders
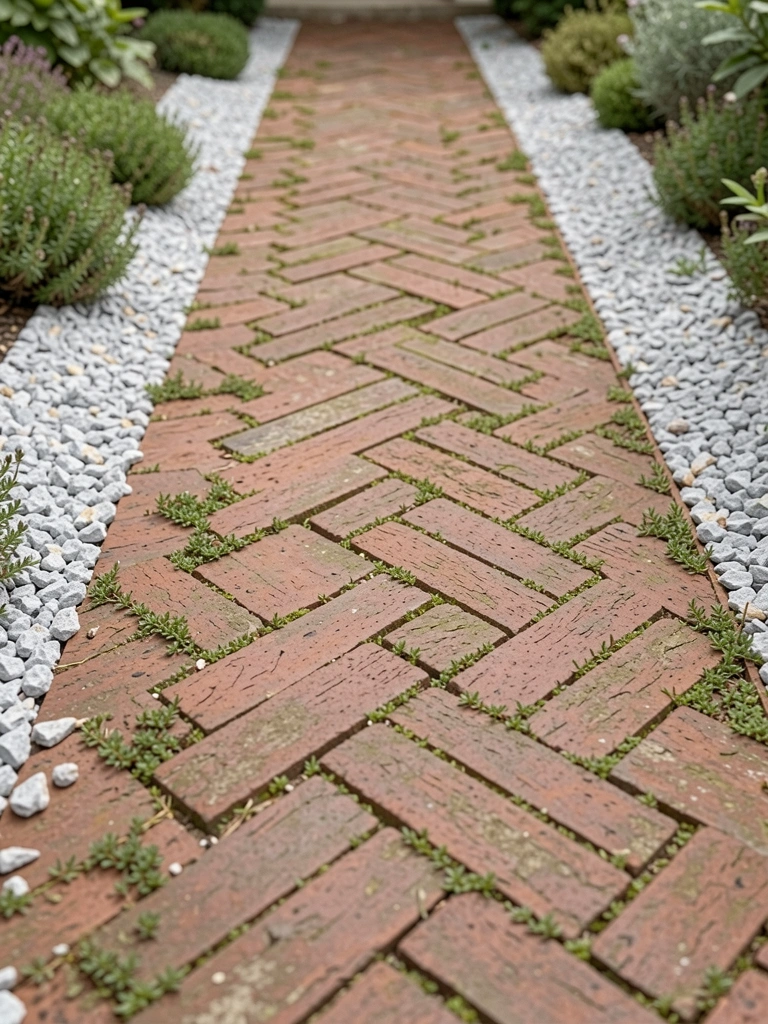
Herringbone in my front path—cut bricks at 45 degrees for the ends. Gravel shoulders keep it stable, let water drain fast. Thyme creeps in from the sides, green all year.
It grips your shoes on slopes, looks intentional without fuss. Draws folks right to the door.
Bricks shifted once from frost—tapped 'em back, added gravel. No big fix.
Lay from the center out. Keeps lines straight.
What You’ll Need for This Look
- Red brick pavers for herringbone (4×8 inch)
- Crushed gravel for shoulders (1/4 inch, 50 lb)
- Creeping thyme plants (plugs)
- Brick chisel and mallet set
4. Rustic Brick Steps Integrated into a Walkway
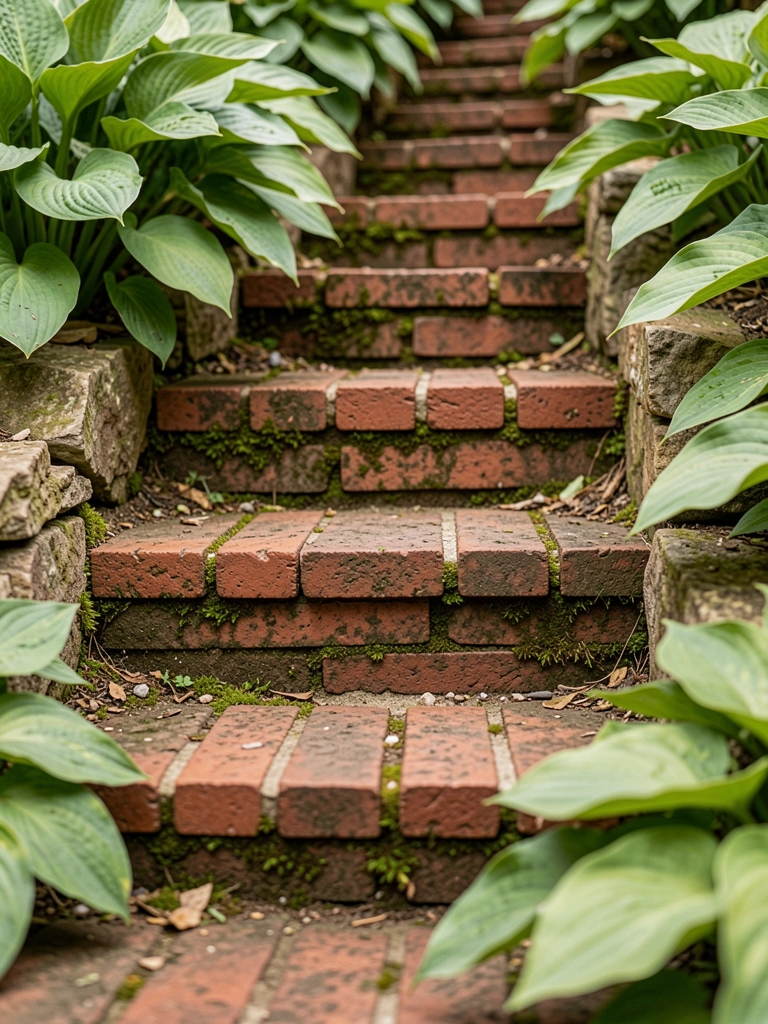
On my slope to the orchard, I built these steps with old bricks—no mortar, just sand base. Hostas tuck the sides, their leaves brushing your legs.
Climbing feels easy now, part of the garden flow. Rust shows patina quick.
Used too-wide treads at first—narrowed to 12 inches. Safer step.
Stack dry, tamp firm. Plant right after.
What You’ll Need for This Look
- Reclaimed red brick pavers (assorted)
- Hosta plants (bare root bundle)
- Coarse sand base (50 lb)
- Tamper tool for pavers
5. Brick Walkway Bordered by Daylilies
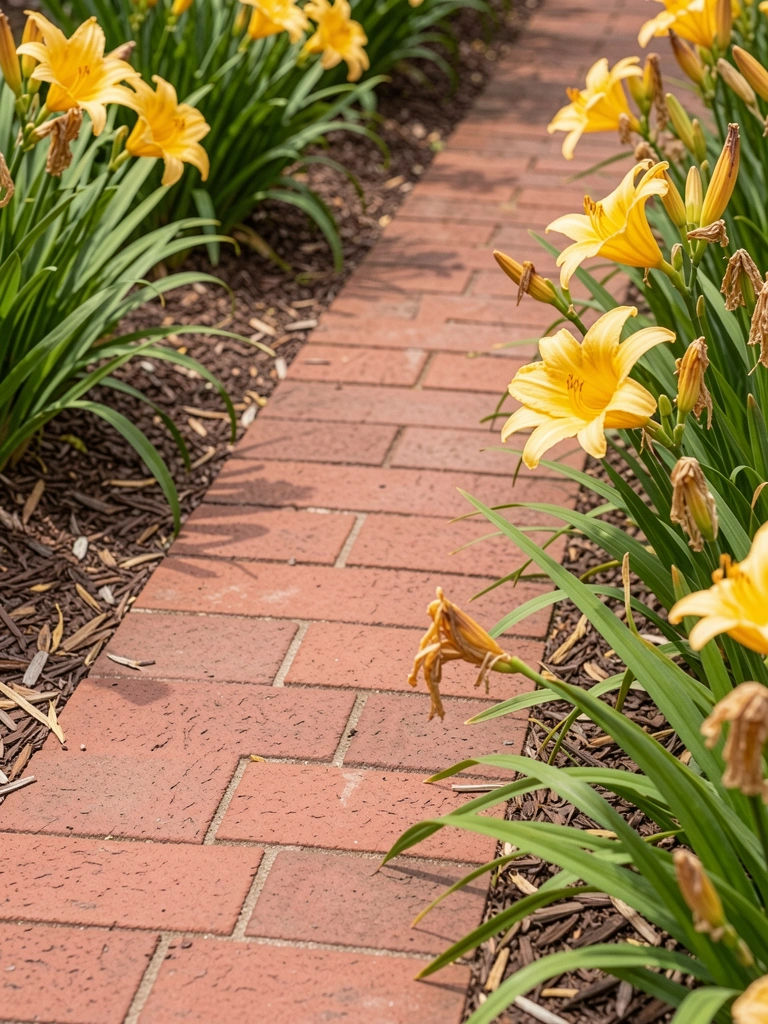
Daylilies frame this path to my shed—'Stella de Oro' reblooms all summer. Bricks in soldier course at edges for crisp lines.
Blooms pull color right to your feet, path feels alive. Low care once established.
Planted too close—divided after year two. Now room to walk easy.
Divide every three years. Deadhead for more flowers.
What You’ll Need for This Look
- Red brick pavers (8×4 inch soldier)
- Daylily 'Stella de Oro' (1 gallon)
- Organic mulch (cedar, 2 cu ft)
- Solar path lights (stake, warm white)
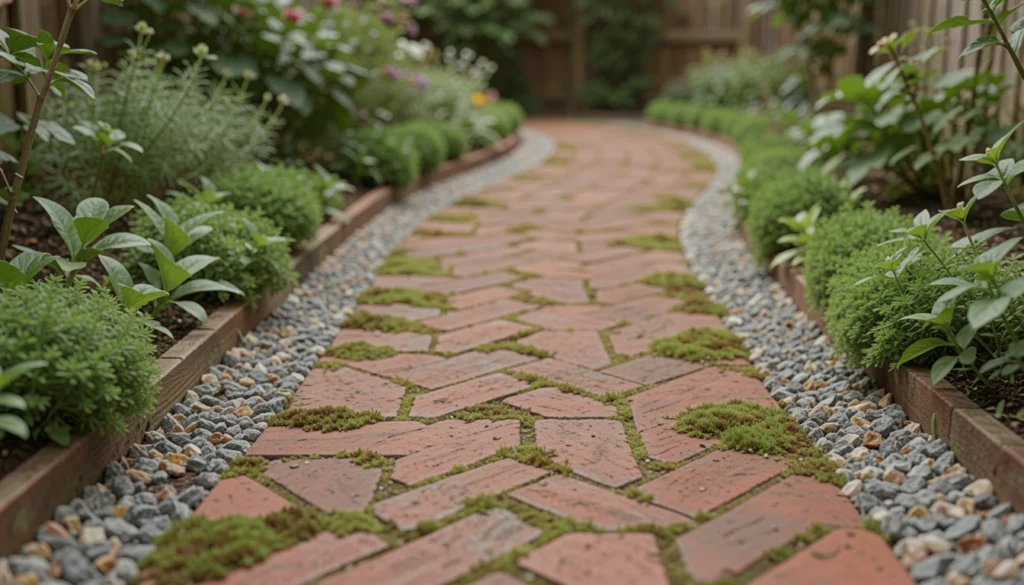
6. Woven Brick and Stone Walkway Mix
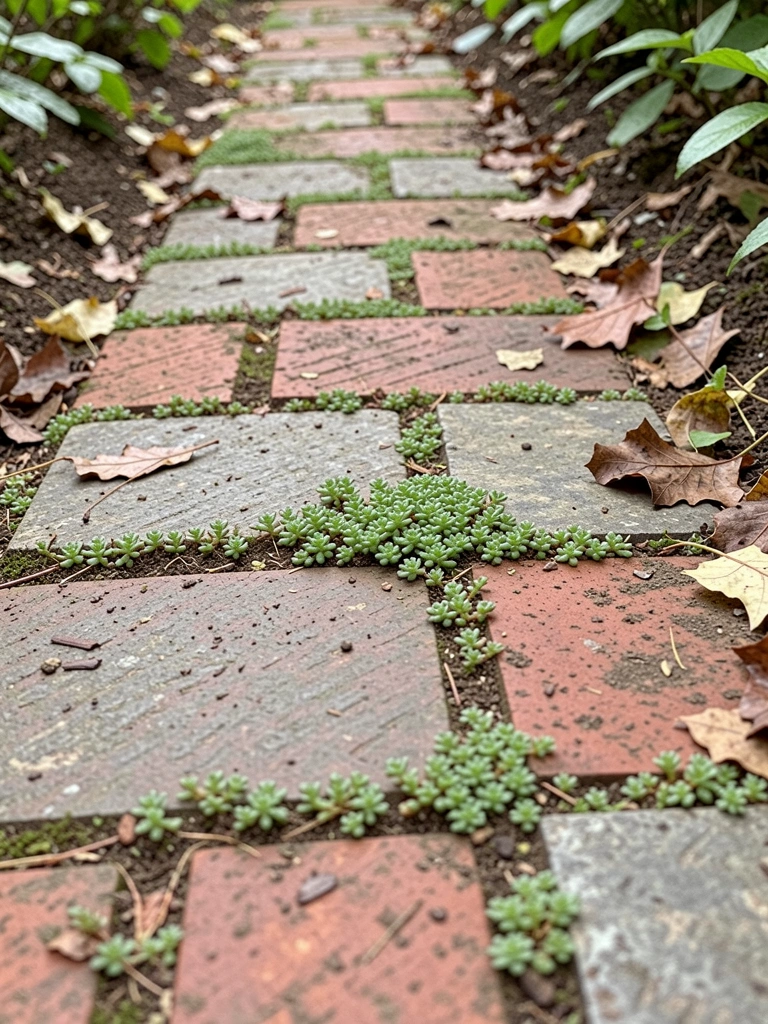
Mixed bricks with fieldstones here—alternating for texture. Sedum fills cracks, stays low.
Feels like it grew there, not built. Path invites slow strolls.
Stones settled uneven—wedged with sand. Holds now.
Source local stones. Mix loose.
What You’ll Need for This Look
- Red brick pavers mixed set
- Fieldstone flats (natural gray)
- Creeping sedum plugs (pack of 20)
- Play sand for joints (50 lb)
7. Simple Brick Path with Solar Edge Lights
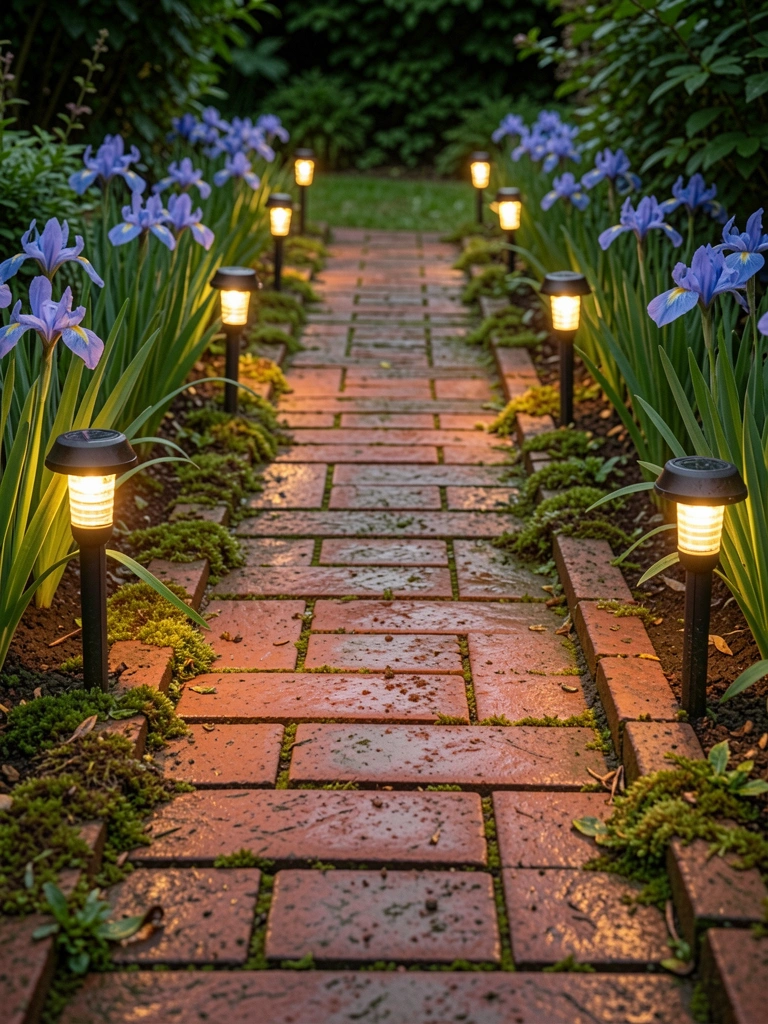
Solar lights line this utility path—stakes every five feet. Dwarf iris adds spring punch.
Lights make evening walks safe, cozy glow on bricks. No wiring hassle.
Batteries faded fast—upgraded waterproof ones. Last two seasons.
Stake shallow, face south for charge.
What You’ll Need for This Look
- Standard red brick pavers (4×8 inch)
- Solar pathway lights (stainless steel, 8 pack)
- Dwarf iris bulbs (pack of 25)
- Paver base sand (50 lb bag)
Final Thoughts
Pick one idea that fits your yard's shape and light. Start small—maybe just ten feet. It'll grow with you.
No need for all seven. One good path shifts the whole feel. You've got this; dirt under nails proves it.